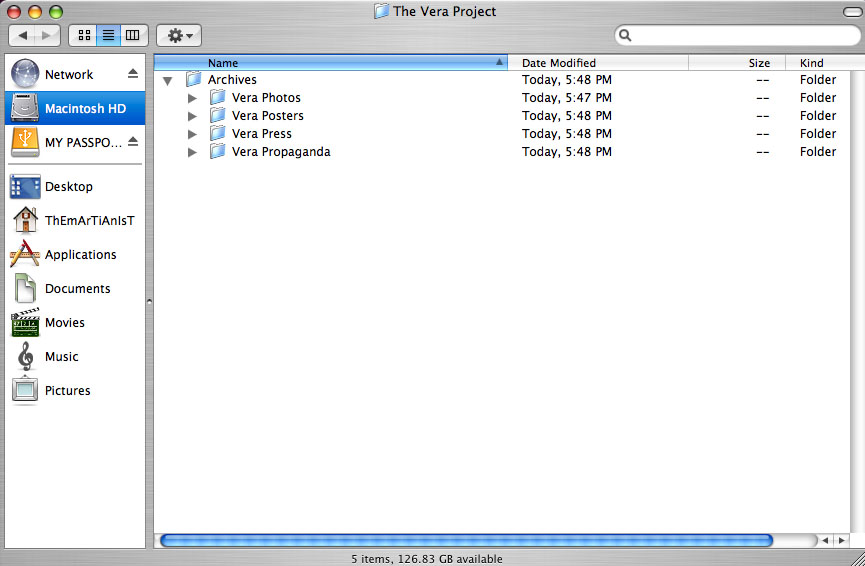
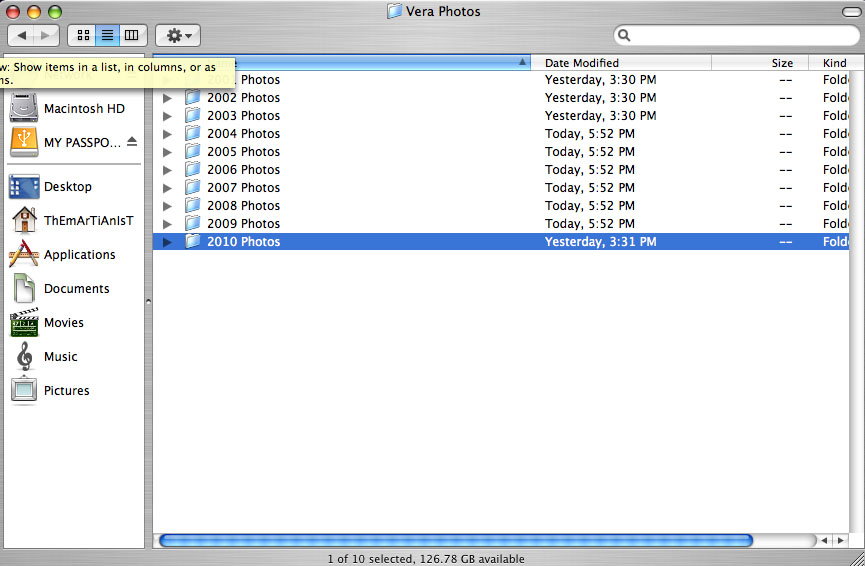
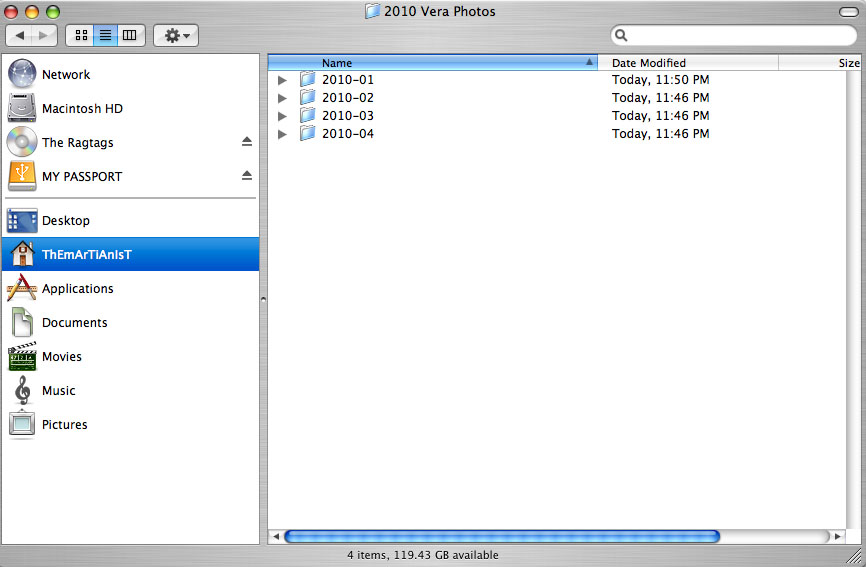
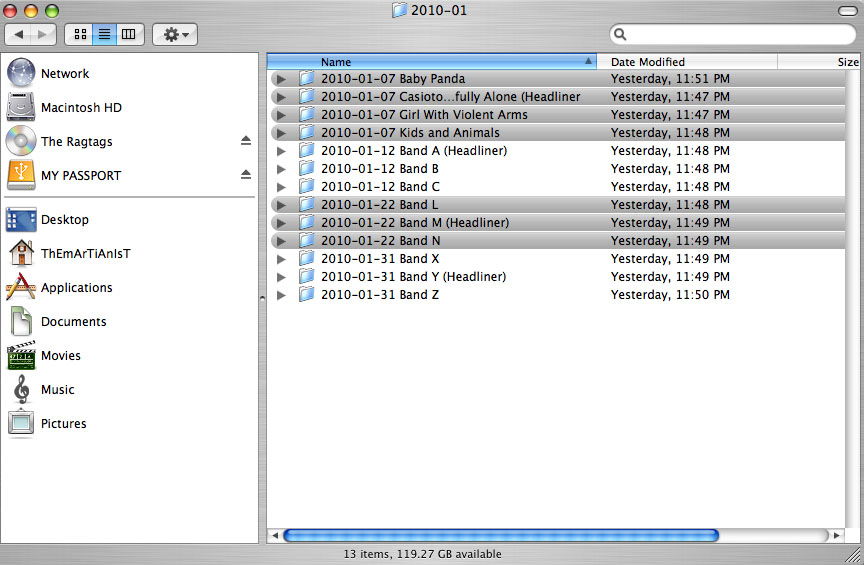
At long last here it is - so feast your eyes. I'm overall very pleased with the result: my own work and its reception back in February. I managed to even keep it a little bit lively by throwing in a few jokes even though I was incredibly nervous going into it - it was my largest audience yet. In attendance were of course the usual suspects: Dustin Fujikawa - Vera's front desk manager, Nora Mukaihata - my advising librarian, Shannon Roach - Vera's Managing Director, and Josh Zimmerman - my advising Archivist. In addition to this powerhouse of absolutely talented and charming individuals, were Alexanne Brown - an observing Ethnomusicology student from the University of Washington, Rowdy Gleason - one of Vera's audio engineering interns, and Jeff McNulty - Vera's Program Coordinator. Jeff in particular has been great to work with on this project; we had many fruitful conversations throughout the research phase.
After I presented the report, the main team and I plotted out the timeline for the remainder of the internship. Since this time though a few changes have been made to the calendar and the images below reflect those changes.


...p.s. be sure to check out the appendix at the end of this post for some more tantalizing images!
I. Introduction – The Deliverables
- Assess how much content there is, and how quickly the collection is likely to grow
- Figure out the best storage for audio archives (naming conventions, file format, where to store them)
- Figure out how to make these audio archives searchable
- Document all of the above & explain it to Vera staff
II. Present Arrangement of Vera Audio Materials
File formats used: WAV, AIF, mp3, ptf (protools file), and digital audio tapes (DAT)
A. The Hard Drives:
All drives are located in the Vera Recording studio inside or on top of the PowerMac
1.) Internal 300GB HD - Live Shows & Studio Mixdowns
Main folder: Live Show Mixdowns
>Sub folder: Name of band, date, initials of who recorded it
- File name: whole show, date
- File name: individual song,
>Sub folder: Rough mixes (day of show)
>Sub Folder: Live shows mp3s
>Sub Folder: 2007 live shows
2.) External 500GB HD – Two partitions: mostly back-ups of live recordings
Main Folder: Vera Backup A-M
>Sub Folder: name of band, date, initials
Main Folder: Vera Backup N-Z
>Sub Folder: name of band, date, initials
3.) External Vera recording drive
Protools session files organized like so:
-One folder for a whole show named by headlining band, date, initials of who recorded it
This folder includes files for the opening bands as well
-Eventually all bands will have their own separate folder
B. Basic Workflow:
-The recording drives employ a system of highlighting
- Green: indicates a folder whose contents have been mixed
- Orange: indicates a folder that is ready to be backed up
- Red: indicates a folder that has been backed up
- For live shows and recording sessions, they record to a recording drive
- These files are then mixed
- Then they are backed up onto a DVD (the protools files)
- Then the protools files are copied from the recording drive to a Back-Up Drive
They like to keep the recording drives as empty as possible - nothing stays in there permanently
C. Amount of Content and projected Growth
There is about 500 GB of archived Audio. Jeff made a gratuitous prediction that we could record as much as a terabyte of audio for 2010 alone.
III. Recommendations for Individual Issues in Audio Preservation
A. Storage Hardware
RAIDS
The industry unanimously recommends storage of digital audio onto multiple hard disks in multiple locations. The most reliable storage system that exists is referred to as a RAID (Redundant Array of Independent Disks). Wikipedia defines a RAID as “an umbrella term for computer data storage schemes that can divide and replicate data among multiple hard disk drives”. Essentially, the RAID has two goals: data reliability and/or increased input/output performance. Each Hard Disk on a RAID configuration mirrors the other in case any single one should fail. Despite the fact that there are multiple hard disks, the RAID appears as a single disk from the point of view of the end user.
There are many different RAID configurations - each with their own purpose.[1] For our purposes, either RAID 5 or 6 appears to be the best configuration out there. First, they distribute their error correction data (parity data) over multiple disks. Second, they employ data striping, which distributes segments of a single file onto multiple disks allowing for greater performance. That is, while a CPU can often process information quicker than a single disk can supply it, the CPU can pull multiple segments of a file simultaneously rather than waiting for a single drive to supply each one on its own.
Recommended Storage Configuration for Vera:
1. The Studio PowerMac with three additional drive bays.
- External Drive: Recording Drive (Origin)
- Bay 1: Live Recordings A-M (Native – 1st Backup)
- Bay 2: Live Recordings N-Z (Native – 1st Backup)
- Bay 3: Studio Recordings (Native – 1st Backup)
2. First RAID 5 or 6 (In-Studio)
- Identical to the PowerMac (local – 2nd Backup)
3. Second RAID 5 or 6 NAS (Network-Attached Storage)
- Identical to the Power Mac (Remote – 3rd Backup)
- Will be connected to the Vera Server
4. Optional Third RAID 5 or 6 (Off-Site)
- Identical to the Power Mac (Foreign – 4th Backup)
- Possibly stored at the University of Washington
Once this system is in place, Vera should no longer back up protools files onto DVDs and create audio cds. DVDs and CDs are universally recognized as an unreliable, unsafe, and short-term preservation medium. They can be easily damaged and the logistics of storing them over time becomes extremely problematic. Additionally, the cost of DVDs/CDs over the long term is astronomical relative to hard drives. With the rising prevalence of purely digital formats and consumer devices designed to store and operate these, it is no longer advisable to use what is quickly becoming obsolete. The only exception to this I can imagine would be when bands specifically request a CD of their performance. By all means, one can be provided.
Low-Cost Setup
Vera can easily purchase low-cost PC towers with multiple bays then purchase the drives to populate them. For the NAS tower connected to the Vera server, it would require programming with a free Unix based program called FreeNAS: an embedded open-source NAS distribution program.[2] Furthermore, we could likely seek the services of a volunteer to perform this setup.
Aside from the programming aspect, PC Towers on Google Shopping come with as many as 10 bays and start as low as 30$. Individual hard drives on Google Shopping start as low as 70$ each for 1 Terabyte. RAID 5 and 6 require at least 3 or 4 drives respectively to setup. At these numbers, this would roughly equate to 720$ at the absolute lowest startup cost with the RAID 5 Configuration. RAID 6 is about 930$. I am guessing that the cost would very likely be higher. I would recommend starting with a RAID 6 on two 10-bay towers and starting out with a capacity of about 2TB. Then, whenever the collection reaches the RAID’s capacity, a new drive can be purchased and inserted into the next available slot.
B. Folder and File Naming Conventions
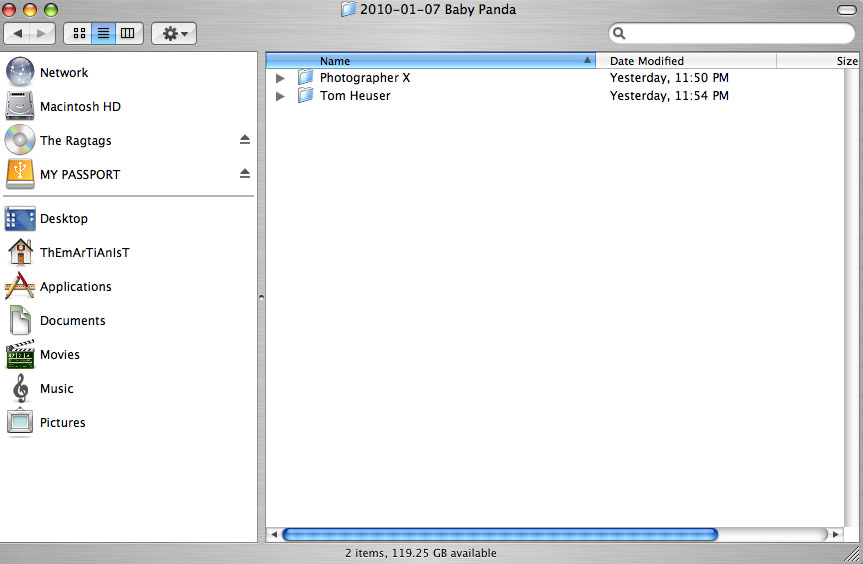
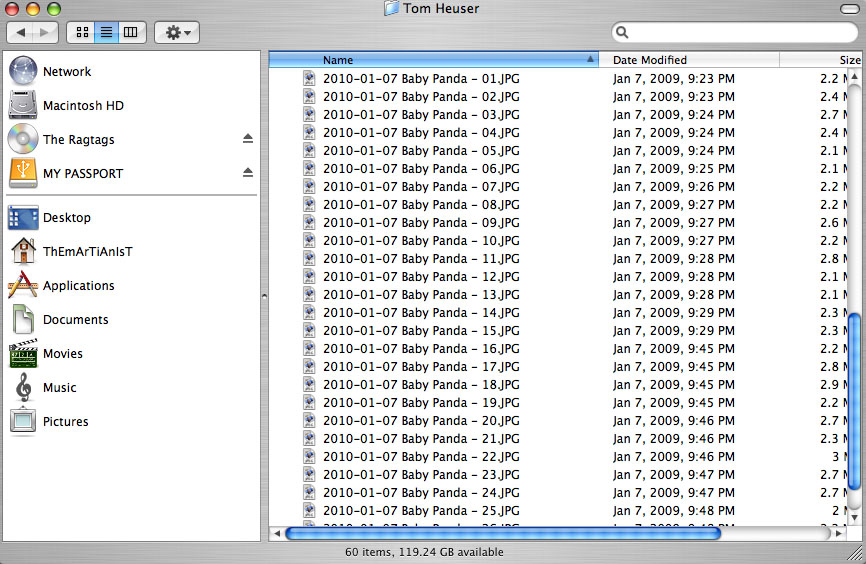
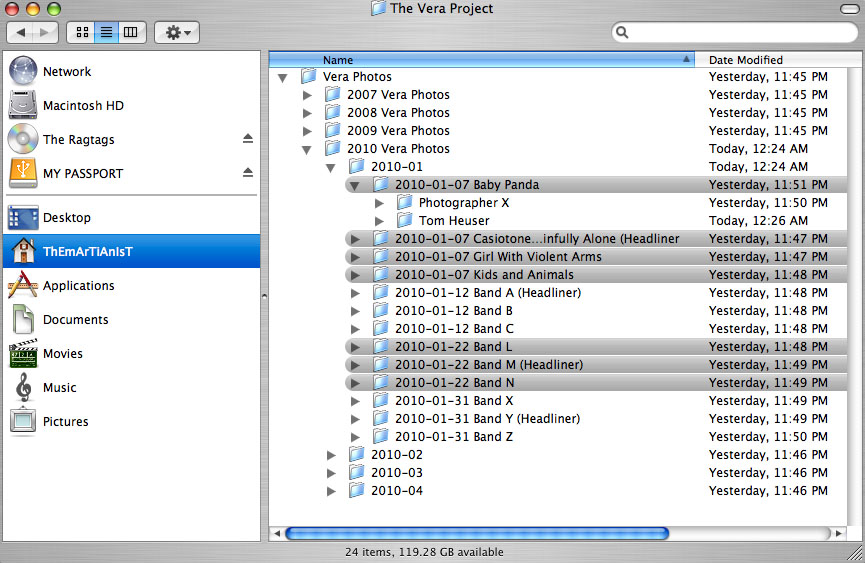
To meet the needs of the recording studio and Vera overall, it is absolutely imperative to adhere to a strict folder and file-naming scheme to enhance access to audio materials. If everyone uses the same language, whether they are creating audio or simply searching for it, they can all access it quickly and independently of one another. Therefore, with the guidance of Jeffery McNulty, I have laid out the following folder and file-naming conventions for the Vera Recording Studio.[3]
Studio Recording
Date, Artist Name, initials
>Song name (protools folder)
song.ptf
>Audio Files ß amount varies, may be multiples for each instrument numbering sys?
instrument.wav
instrument.wav
>Fade Files ß protools names these automatically, will never be accessed later
wav files
>Plug-In Settings ß not usually part of a project but should be
>Session File Back-Up
song (backup).ptf
>Rough mixes
1 – song name (rough mix).wav
2 – song name (rough mix).wav
>Final Mix (high-resolution)
1 – song name (high-res).wav
>Final Mix (low-resolution)
1 – song name (low-res).wav
>Album name (Masters)
1 – song name (master).wav
>Stereo Mixdowns ß for Mp3s and CDs
1 – song name (mixdown).wav
Live Recording
Date Artist Name Initials
Date Artist Name Initials.ptf
>Rough Mixes
Date Artist Name Initials.wav
>Show Template
>Session Back Up
1 – Date Artist name Initials (backup).ptf
>Stereo Mixdowns
Date Artist Name Initials.wav ß this will be the file for the whole show
1 – song name.wav ß these will be for individual songs extracted from the file above
2 – song name.wav
Mp3 collection (lives separate from a recording project)
Artist Name
>Album
1 - song.mp3 ß individual song
Artist Name Date initials ?.mp3 ß whole show
C. Format and Resolution Standards
The recording studio employs both aif and broadcast wav format almost indiscriminately. There does not appear to be any pattern to their usage. The only practical use for the aif format in the studio is to burn CDs and DVDs using a program called Toast. This program only burns these discs with aif files and it will automatically convert any other format to aif before burning a disc, which takes extra time. Now, both aif and wav are equally high quality, yet the latter is the more widely held standard and it captures basic metadata. Conversely, aif does not capture metadata and is oriented more towards Mac users who use toast. Therefore, I recommend universally applying the broadcast wav format for all files mixed from the original protools files and if possible, finding a CD burning program to burn CDs directly from wav files, if a band so happens to request one. The current practice is just far more confusing and disorganized than it needs to be when there exists a more rigorous and useable format. If such a CD burning program does not exist, I would then recommend at the very most only making the low-resolution (44.1 kHz / 16-bit) mixes into aif format. Furthermore, we simply do not need to create high-resolution aif files because RAIDs will be replacing the DVD backups.
Speaking of resolution, there is not a universally enforced standard for file resolution at Vera. The reason is that there really can’t be. While the industry-wide standard is now 96 kHz /24-bit, every audio engineer (at least for studio performances) has his or her own particular preferences. It is almost impossible to enforce a standard. Therefore I would recommend emphasizing the industry standard, but leaving it to each engineer to decide. Jeffery has indicated that for live shows it will be easier for us to apply a standard. He indicated a common usage of 88.2 kHz / 24-bit noting that the difference between 88.2 kHz and 96 kHz is negligible. The reason for recording at 88.2 kHz is for the ease of mixing down to 44.1 kHz 16-bit for mp3 and audio CDs. Therefore, I recommend that this be the recording standard for live shows.
D. Metadata
Audio engineers can track the following metadata using their tracking sheets. Later on, this information should be entered into a pdf file with its name identical to the file it describes. This will make the information contained within it searchable from both a Mac and pc. However you might be thinking it would be incredibly daunting and time consuming to enter all this metadata into pdf files over and over again. On the contrary, assuming that groups of files are created together, by the same person, at the same bit depth and sample rate, on the same day, and are the same event type, one could easily enter this information once into a pdf, save it as a temporary template to be copied over and over for each audio file in the group, only then requiring going back and entering the duration of each file.[4]
1.) Format (I realize that the recording studio won’t deal with LPs but since we have an LP in our
Archives, I’m guessing its possible that we might receive more in the future)
• Digital file
• LP Commercial microgroove disc
• CD – Compact audio disc.
• DVD
• DAT – Digital Audio Tape.
2.) File Type
(.wav) (.mp3) (.ptf) (.AIF)
3.) Bit Depth (Usually 24-bit standard)
The number of bits per sample for the audio content of the described audio object.
4.) Sample Rate (Usually 96 kHz standard)
The sample rate of the audio data for the described audio object.
5.) Checksum Value
A string indicating the checksum signature of the audio object.
7.) Checksum Creation Date
Indicates the time and date the signature in the checksum value element was
generated.
8.) Duration of File
9.) Date Recorded
10.) Recorded by
name or initials of the one who recorded it
11.) Mixed by
name or initials of the one who mixed it
12.) Artist
name of band(s) / performer(s)
13.) Event Type
Live or Studio Recording
E. Quality Control, Data Migration, and Optional Evaluation Metadata
Quality Control
It is recommended that an audio engineer periodically listen to files to check for any errors or alterations. Given the amount of audio that Vera has however, this would be an epic task. I therefore recommend that evaluations be performed during the mixdown process from this point forward. That is, if the audio engineer notices any anomalies in the recording, he or she should take note of them – perhaps on a separate evaluation sheet. Otherwise, there is a process called “Checksum,” an algorithm designed to check files for errors and alternations. This algorithm returns a series of numbers and letters. One can determine if an error has occurred when periodically running this algorithm and comparing the series of numbers. I recommend performing a checksum every time files are backed-up.
Unfortunately, I have not yet found a fully functioning and efficient method for performing checksums. The Disk Utility on a Mac is capable only of performing a checksum on an entire hard drive rather than a selection of files. This is rather problematic because say for instance there are multiple projects on the recording drive and only one of them is ready to be backed up. If you checksum the whole drive it will include the other projects. Then when you back up that single project onto another drive the checksum value for the new copy will of course be different because the new copy does not include those other projects.
There is another option for performing a checksum through the Mac’s automator program. I set this program up on my own Mac and executed it. I performed a checksum of a group of files on one drive, obtained the checksum value, then copied the files to another drive, and ran the checksum program again. Only it refused to give me the value. Further testing is required. However, if a solution cannot be found, I would recommend foregoing the Checksum task altogether.
Data Migration
There are two issues in data migration and the first is backing up data. The Vera recording studio records a studio or live performance to an external hard drive where it lives as a single project until it is mixed then backed up onto an external hard drive that lives in the studio. I however would recommend that at the end of each recording session, a project be immediately backed up – perhaps using the Mac’s Automator feature – lest the audio engineer have to perform an extra step. Otherwise, the engineer can just click and drag the project to the back-up drive. This way, if the recording drive by chance should fail, the recording still lives. Then, after the original recording has been fully mixed and it comes time to close out a project and back it up, the folders created during the mixdown process can be added amongst the original recording folders already living on the back-up drive.
The second issue in data migration is hardware obsolescence. All hard drives have both a natural lifetime and often before reaching the end of that lifetime, become obsolete. The recommended best practice is to replace hard drives every 4 to 5 years. In this case, I would recommend taking note of the purchase date for each hard drive and scheduling a time to replace it within 4 years. This could be done by placing labels on the outer shell of each RAID tower or even directly on the hard drives with a name and date for each drive.
Optional Metadata for Evaluations
I recommend that this set of metadata be used when the audio engineer discovers errors after the initial recording as he or she listens to it during the mixdown process.
1.) Evaluated By
Name of the person who completed the evaluation.
3.) Evaluation Date
Enter the date this evaluation was performed.
5.) Section Evaluated
Designate the section of the recording that you are evaluating. This will be either the entire
object or a specific Region or Stream.
6.) Problem[5]
Documents any anomalies present on the recording
7.) Notes
F. DAT Conversion (Special Addendum)
While the conversion of Vera’s DAT collection is already underway, I thought it might be useful include the following recommendations. There exists an abundance of information on the subject of converting audio materials from their physical form into electronic/digital. Sound Directions – a joint Audio preservation project between Indiana University and Harvard College – has the most in depth publication for this procedure, the more technical aspects of which are beyond the scope of my general archival purview. Therefore, I have included only the most relevant portion of their recommendations for the transfer of audio from a physical to electronic format in this report.[6]
Best Practice 1: Use audio engineers and technicians with solid technical skills and well-developed critical listening abilities at points in the preservation transfer workflow where their skill is required.
Best Practice 2: Perform preservation transfers in an appropriately designed, critical listening environment. [I.e. one without ambient interference] If such a space is not available, choose a room that is quiet and is removed from other work areas and traffic, and be acutely aware of its sonic deficiencies.
Best Practice 3: Route the signal from the playback machine to the analog-to-digital converter using the cleanest, most direct signal path possible. [I.e. ones designated specifically for preservation work.]
Best Practice 4: Design the monitoring chain to allow instant comparison of the signal from the playback machine to the signal that has passed through the analog-to-digital converter. The ability to monitor the signal from both the playback machine and post-A/D converter enables verification of the A/D conversion and allows easier diagnosis of potential problems heard during transfer
Best Practice 5: Preservation studios must include test/calibration equipment to test and monitor the transfer chain itself for noise as well as to test individual components for performance. During transfer, the test/calibration equipment shall not be inserted between the playback machine and the recorder.
Designing an audio preservation studio:
- Design the preservation studio as a critical listening environment and know its limitations
- All signal chain components must be tested so that they are known to be of professional-quality, that they are reliable, and that they do not alter the level or quality of the audio signal at unity
- The most direct and clean signal path from source to destination must be used at all times.
- There may be no unused devices in the signal path. If there are multiple destination formats for the transfer, then the signal must be routed in parallel without any daisy-chaining of devices.
- Signals shall be split or distributed using only calibrated, high-quality distribution amplifiers, routers, or properly designed and wired balanced cables and patchbays that demonstrably do not degrade the signal
- Use the highest quality signal format present on the source equipment and throughout the chain. For instance, use a balanced signal source rather than an unbalanced signal source
Cost: It may be necessary to engage the audio engineering community, as there does appear to exist an informal, short list of converters that engineers believe are of high-enough quality for preservation transfer work. These tend to range in price from around $1,000 to $10,000 and more.
IV. Access
With our end-users consisting of both staff and patrons, ease of access to audio materials is essential. With this in mind, I’ve been working diligently to determine the best way to improve access to Vera’s audio materials and there are two options: Adobe pdf and Salesforce.
A. Adobe PDF
The Adobe pdf file format is the simplest solution. The contents of a pdf can be searched both on the Windows Explorer search bar and the Mac Spotlight Search. Therefore, if Vera desires a cost-free and immediate option, I would strongly recommend creating one pdf file for each audio file and giving them identical names. Each pdf will then describe the audio file – whose name it shares – in the form of metadata. This means if anyone wants to search for all the files that were mixed or recorded by one individual or even all files recorded on a certain date, he or she may do so easily. Once gain, groups of audio files will inevitably have certain metadata in common, so filling out the fields should be a relatively quick process.
B. Salesforce
Salesforce is the second option, which would be very effective in tracking and describing audio at the project level instead of the individual file level (lest we clog their server). I can easily imagine this accommodating anyone outside the audio team who has no need or interest in searching hundreds of audio tracks of single instruments or different mixes.
For the past month, I have been tinkering with Salesforce and have found it relatively easy to customize. It resides on the Internet and can be accessed anywhere simply through an email and password login and a one time computer activation. In the demo version, there is a row of tabs across the top of the screen. The user can easily create a tab by clicking on the setup button just above these. In the setup page there is a side bar with several options. First, you create an object, which will serve as a template when you go to create a new tab. You give the object a name then proceed to the next page where you can add in or remove as many fields as you wish. Once complete, you then create a new tab and use the object you just created as its template. Any user can then go into any of the custom tabs, say audio for instance, and create as many entries as he or she wishes and run a search by keyword. So, if we create entries with fields that tell the end-user where an audio project lives on the server, he or she can then click the link to it and browse through the files at his or her leisure and if need be, read the individual metadata pdf files accompanying them.
V. Summary via Workflow
So you may be wondering how all of this fits into the big picture, below are a list of simple steps to give you a rough idea of how this could look.
A. Hardware setup
1. Purchase at least two 10-bay PC towers and eleven 1TB drives
2. Configure each tower to RAID 6 (each with four drives)
3. Install the remaining hard drives into the Mac.
4. Effective capacity should be 2TB and each RAID will contain the entire Vera audio collection.
5. Give a name or number to each drive, note its date of purchase – perhaps with labelson the outer shell of the RAID tower – and schedule their replacement 4 years ahead using the Mac’s built in calendar, which can automate the reminder.
6. When the collection reaches capacity, purchase another 1TB drive and insert into the next available bay.
7. Record its date of purchase and schedule replacement.
8. Repeat these steps until the RAID reaches physical capacity.
By the time the tower reaches capacity, it’s likely that individual internal hard drives will have higher capacity at which point, Vera can purchase 2 or 3TB drives to replace the 1TB drives. Otherwise, a whole new tower can be created following the same principles laid out above.
B. Protools Recording Session
1. Open Protools and starts a new session
2. Read the folder and file naming template provided[7] and start by creating a folder for each band recorded e.g. “2010-02-24 Tommy Salami JMM”
3. Obtain a metadata tracking sheet and fill in each field for each file you create.
4. At the end of a show or studio session, burn a cd for the band(s) if they request one.
5. Run a checksum on the session as a whole and record the value onto the tracking sheet.
6. Back-up the files onto the PowerMac drives and the in-studio RAID tower by simply
clicking and dragging the folders you created during session.
7. Run the checksum again on each back-up and compare the values.
8. If the values do not match, the files did not back-up correctly and need to be backed up
again.
9. Place the audio metadata tracking sheets into a place to be designated for an intern to
enter into pdf files later.
C. Protools Mixing Session
1. Obtain a metadata tracking sheet and fill in each field for each file you create.
2. Reopen the original recording session in protools and continue to follow the naming
template provided.
3. Record all of your high and low resolution mixes in broadcast wav format.
4. Record all high-resolution wav files for live recordings to 88.2 kHz 24-bit
5. Record all low-resolution wav files to 44.1 kHz 16-bit
6. If any errors are detected obtain an evaluation sheet (?) and take note of them. Attach
the evaluation to your regular metadata tracking sheet.
7. Create mp3s for completed songs then name and file them according to the naming template specifications.
8. Run a checksum on the mixes and record the value onto the metadata tracking sheet.
9. Back-up wav mixes and mp3s to the Mac tower and in-studio RAID Tower
10. Run the checksum again and compare the values, if the values do not match, the files must be backed up again.
11. You have officially completed an audio project.
D. Intern Data Entry Session
1. Obtain the metadata tracking sheet placed in the area designated as “completed sessions”
2. Open the Adobe PDF file titled “audio metadata template”
3. Enter all the metadata fields for groups of files that share certain metadata in common and save it as your temporary template.
4. For each audio file in a project, use one of these templates, fill in the remaining metadata from the tracking sheet, and resave the file with the same name as the file it describes.
5. Repeat these steps until you have recorded all metadata for each audio file.
6. Copy these PDF files to the Mac and in-studio RAID tower.
7. Perform a final back-up of the whole project to the NAS RAID tower.
8. Open the salesforce database and click on the tab titled “audio” then click on “New”
9. Fill in all the fields for the project entry and click “Save”
10. Congratulations an audio project has just been cataloged!
A brief teaser…
With my on-going conversations with Darren White about many of the technical aspects of digital audio, he informed me of a new storage method on the horizon: the Solid State Drive.
Here’s what he had to say:
As for SSDs, it's basically like a giant RAM chip, but non-volatile, so you don't lose data when you power down. No moving parts can mean a very long mean-time-between-failure as compared to a mechanical drive, like a hard disk. There is still a need for prudence hence redundancy and right now SSDs are prohibitively expensive for TB+ storage needs. But eventually, some type of solid state storage (or maybe bio- or quantum-storage) will overtake hard drives as we currently know them. I know things will look at lot different say, 5-7 years from now.
In light of this revelation, I would highly recommend keeping track of this trend as the first purchase of back up storage elements reaches its date of obsolescence.
[1] http://en.wikipedia.org/wiki/RAID
[2] Suggested by Darren White http://freenas.org/freenas
[3] See the appendix for more detailed examples of these conventions could look.
[4] There exists another more thorough and complicated option for metadata capture still under development by Sound Directions called the Audio Technical Metadata Collector. Visit the link provided below for more information.
[5] For standardized vocabulary be sure to visit the link provided below for the Sound Directions Audio Technical Metadata Collector and flip to page 21.
[6] For more in depth information about conversion, be sure to visit: http://www.dlib.indiana.edu/projects/sounddirections/papersPresent/sd_bp_07.pdf
and proceed to page 22, titled: “Personnel and Equipment for Preservation Transfer.” There are also specific recommendations for setting up equipment for DAT conversion on page 31.
[7] This can be placed in an area that is easily seen and readily accessible – a tack board for instance.
VI. Bibliography
A. Issues in Preservation
1. Mike Casey and Bruce Gordon, Sound Directions: Best Practices for Audio Preservation, Indiana University and Harvard University: 2007.
http://www.dlib.indiana.edu/projects/sounddirections/papersPresent/sd_bp_07.pdf
2. Mike Casey and John Ross, Technical Committee: Preservation of Archival Sound Recordings, Association for Recorded Sound Collections (ARSC): 2009.
http://www.arsc-audio.org/pdf/ARSCTC_preservation.pdf
3. Gareth Knight & John McHugh, Preservation Handbook: Digital Audio, Arts and Humanities Data Service: 2005.
http://ahds.ac.uk/preservation/audio-preservation-handbook.pdf
4. Various Authors, Digital Audio Best Practices Version 2.1, Collaborative Digitization Program: 2006.
http://www.bcr.org/dps/cdp/best/digital-audio-bp.pdf
5. Gary Louie, University of Washington Music School: louie@uw.edu
6. Darren White: deedubyah@mac.com
7. Sound Directions: The Audio Technical Metadata Collector http://www.dlib.indiana.edu/projects/sounddirections/papersPresent/sd_app1_v1.pdf
B. Information on RAIDS
1. General Definitions: http://www.wditech.com/wditech/?p=13
2. General Definitions: http://en.wikipedia.org/wiki/RAID
3. How to setup a low-cost RAID http://freenas.org/freenas
4. Where to buy low-cost towers: http://www.google.com/products?q=PC+Tower&oe=utf8&ved=0CDUQrQQwAg&show=dd&scoring=prd
5. Where to buy low-cost hard drives:
http://www.google.com/products?q=internal+hard+drive+1TB&scoring=p
C. Solid State Drives: A look to the future…
1. http://en.wikipedia.org/wiki/Solid-state_drive
APPENDIX: The Potential Structure for Audio Projects